The picot stitch is a decorative crochet or knitting technique that adds a small, looped edge to your work. It is often used to create a delicate and lacy look, and can be incorporated into a wide variety of projects, from doilies and shawls to clothing and accessories. The picot stitch is created by making a small loop or chain of stitches, which is then joined back to the main fabric with a slip stitch or single crochet. This creates a small, decorative bump or “picot” along the edge of the fabric. The picot stitch can be used as a simple edging, or it can be incorporated into more complex patterns to add texture and visual interest.
The picot stitch is a versatile technique that can be adapted to suit a wide range of projects and styles. It can be worked in different sizes and shapes, and can be used to create a variety of effects, from delicate and dainty to bold and dramatic. The picot stitch can also be combined with other stitches and techniques to create unique and intricate designs. Whether you are a beginner or an experienced crafter, the picot stitch is a fun and rewarding technique to learn and master.
Choosing the Right Materials
When working with the picot stitch, it is important to choose the right materials to achieve the desired look and feel for your project. The type of yarn or thread you use will have a significant impact on the final result, so it is important to consider the weight, texture, and color of the material. For a delicate and lacy look, choose a fine yarn or thread in a light, airy texture. For a more substantial and textured effect, opt for a thicker yarn in a denser texture. The color of the yarn or thread will also play a role in the overall appearance of the picot stitch, so consider whether you want a subtle, tonal effect or a bold, contrasting look.
In addition to choosing the right yarn or thread, it is also important to select the appropriate hook or needle size for your project. The size of the hook or needle will determine the size and tension of your stitches, so be sure to match it to the weight and texture of your chosen material. A smaller hook or needle will create tighter, more compact picot stitches, while a larger hook or needle will produce looser, more open stitches. Experiment with different combinations of yarn, hook/needle size, and stitch tension to find the perfect balance for your project.
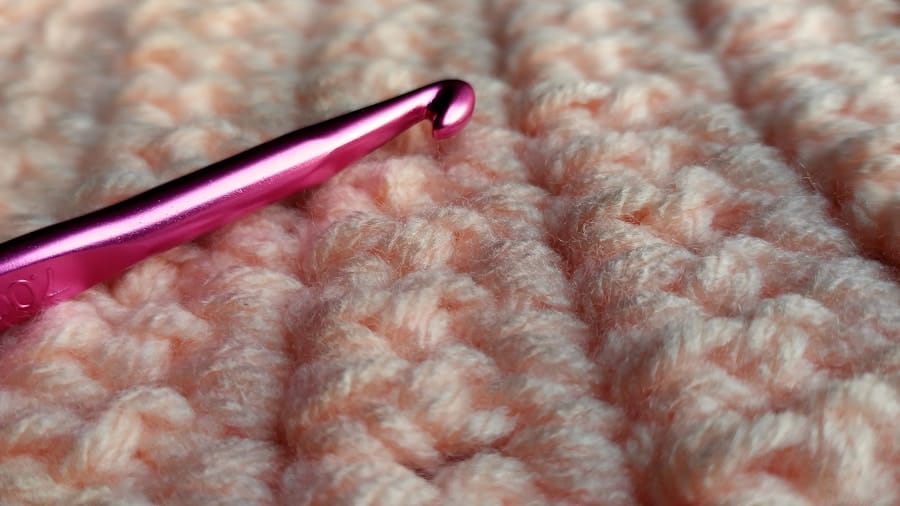
Getting Started with Picot Stitch
To get started with the picot stitch, you will need to have a basic understanding of crochet or knitting techniques. If you are new to these crafts, it may be helpful to familiarize yourself with the basic stitches and terminology before attempting the picot stitch. Once you are comfortable with the basics, you can begin practicing the picot stitch by working small swatches or samples to get a feel for the technique.
To create a basic picot stitch in crochet, start by working a chain of 3-5 stitches, depending on the desired size of your picot. Then, slip stitch into the first chain to form a small loop. This loop will create the decorative bump of the picot stitch. To incorporate the picot stitch into your work, simply work it into your pattern as directed, either as an edging or as part of a larger design.
In knitting, the picot stitch is created by casting on a small number of stitches (usually 3-5) and then binding them off immediately to form a small loop. This loop can then be incorporated into your knitting pattern as desired. Experiment with different sizes and placements of picot stitches to achieve different effects in your projects.
Tips for Perfecting your Picot Stitch
To perfect your picot stitch, there are a few tips and tricks that can help you achieve clean, even results. First, pay attention to your tension when working the picot stitch. If your tension is too tight, your picots may be difficult to work into or may appear too small and cramped. If your tension is too loose, your picots may be floppy and uneven. Practice maintaining an even tension as you work the picot stitch to achieve consistent results.
Another tip for perfecting your picot stitch is to pay attention to the placement and spacing of your picots. If you are working multiple picots in a row, be sure to space them evenly and consistently for a polished look. If you are using picots as an edging, take care to work them evenly around corners and curves for a smooth and professional finish.
Additionally, consider experimenting with different sizes and shapes of picots to achieve different effects in your projects. A smaller picot will create a delicate and dainty look, while a larger picot will create a bolder and more dramatic effect. You can also vary the number of chains in your picots to create different shapes and textures. Practice working different variations of the picot stitch to find the perfect look for your project.
Incorporating Picot Stitch into Your Projects
Once you have mastered the picot stitch, you can begin incorporating it into your projects to add texture and visual interest. The picot stitch can be used as an edging on garments, accessories, and home decor items, adding a delicate and feminine touch to any design. It can also be used as a decorative element within larger patterns, creating lacy motifs and textured surfaces.
For example, you can use the picot stitch to create a delicate edging on a shawl or scarf, adding a romantic and vintage-inspired detail to your design. You can also use the picot stitch to create lacy motifs on doilies or table runners, adding an elegant and timeless touch to your home decor. Experiment with different ways of incorporating the picot stitch into your projects to discover its full potential.
In addition to adding visual interest, the picot stitch can also add structural integrity to your projects. By working picots at regular intervals along an edge or seam, you can create a reinforced and decorative finish that helps prevent stretching and distortion over time. Consider using the picot stitch in areas that may experience wear and tear, such as cuffs, collars, and hems, to add both beauty and durability to your handmade items.
Troubleshooting Common Issues
As with any crafting technique, there may be some common issues that arise when working with the picot stitch. One common problem is uneven tension, which can result in picots that are too tight or too loose. To address this issue, practice maintaining an even tension as you work the picot stitch, and adjust your hook/needle size if necessary to achieve the desired results.
Another common issue when working with the picot stitch is difficulty in working into the small loops created by the picots. If you find it challenging to work into these loops, try using a smaller hook or needle to create more defined loops that are easier to work into. You can also experiment with different techniques for joining the loops back to the main fabric, such as slip stitching or single crocheting.
If you are working with multiple picots in a row, another common issue may be uneven spacing or placement of the picots. To address this issue, take care to count your stitches carefully and space your picots evenly along the edge or seam. You can use stitch markers or pins to help guide you as you work multiple picots in a row.
Exploring Advanced Techniques with Picot Stitch
Once you have mastered the basic picot stitch, you can begin exploring advanced techniques and variations to expand your skills and creativity. For example, you can experiment with different shapes and sizes of picots to create unique textures and patterns in your projects. Try working elongated or pointed picots for a more dramatic effect, or combine different sizes of picots for added visual interest.
You can also experiment with incorporating beads or other embellishments into your picot stitches for added sparkle and dimension. Simply thread beads onto your yarn or thread before working the picot stitch, then slide them up into place as you form the loop. This can add a touch of glamour and sophistication to your projects.
Another advanced technique with the picot stitch is working it in combination with other stitches and techniques to create complex lace patterns and textures. By combining picots with lace stitches such as yarn overs and decreases, you can create intricate and beautiful designs that are sure to impress.
In conclusion, the picot stitch is a versatile and beautiful technique that can add elegance and charm to your crochet and knitting projects. By understanding the basics of the picot stitch, choosing the right materials, practicing different variations, and exploring advanced techniques, you can master this technique and incorporate it into a wide range of designs. Whether you are creating delicate lace shawls or adding decorative edgings to garments and accessories, the picot stitch is sure to become a favorite in your crafting repertoire. With practice and creativity, you can use the picot stitch to elevate your handmade creations and add a touch of timeless beauty to your work.


