Key Takeaways
- The magic circle is a crochet technique used to create a tight and adjustable center for projects like hats and amigurumi.
- The advantages of using the magic circle include the ability to easily adjust the size of the center hole and the seamless appearance it creates.
- Before starting a project using the magic circle, it’s important to gather the necessary materials, including yarn and a crochet hook.
- Creating the magic circle involves a series of steps, including wrapping the yarn around your fingers and working stitches into the loop.
- Increasing stitches within the magic circle allows you to gradually expand the size of your project while maintaining a neat and uniform appearance.
Understanding the Magic Circle
The magic circle, also known as the magic ring or adjustable loop, is a fundamental technique in crochet that allows you to create a seamless and tidy starting point for your projects. Unlike the traditional method of chaining a certain number of stitches and then joining them into a ring, the magic circle offers a more elegant and versatile solution. By mastering this technique, you’ll be able to create a wide range of crochet projects, from amigurumi to hats and beyond, with greater control and precision.
At its core, the magic circle is a loop that can be adjusted in size as you work, enabling you to create a tight and compact starting point for your crochet piece. This is particularly useful when working in the round, as it allows you to begin your project without the unsightly gap that can occur with the traditional method. The magic circle also provides a more stable foundation, making it easier to maintain consistent tension and shape throughout your work.
One of the key advantages of the magic circle is its versatility. This technique can be applied to a wide range of crochet projects, from simple to complex. Whether you’re creating a delicate flower, a cozy hat, or an intricate amigurumi figure, the magic circle can be seamlessly incorporated into your design. Its ability to facilitate increases and shaping makes it an invaluable tool for crocheters of all skill levels, allowing you to explore new possibilities and push the boundaries of your creativity.
Advantages of the Magic Circle
The magic circle offers a range of benefits that make it a must-have technique in the crochet arsenal. One of the primary advantages is the tighter and neater starting point it provides. By creating a closed loop rather than a traditional chain, the magic circle eliminates the unsightly gap that can often occur at the center of a crocheted piece. This results in a more polished and professional-looking finish, which is especially important for projects that require a seamless appearance, such as amigurumi or circular motifs.
Another key advantage of the magic circle is its ability to facilitate the creation of seamless and continuous rounds. When working in the round, the magic circle allows you to transition smoothly from one round to the next, without the need for a visible seam or join. This is particularly beneficial for projects like hats, bags, and other cylindrical or spherical shapes, where maintaining a consistent and uninterrupted flow is crucial for achieving the desired look and structure.
The magic circle also makes it easier to increase stitches within the circle, which is a crucial technique for shaping and expanding your crochet projects. By working directly into the center of the loop, you can gradually increase the number of stitches as your project grows, ensuring a smooth and controlled expansion. This versatility allows you to create a wide range of shapes and silhouettes, from simple circles to complex geometric patterns.
Furthermore, the magic circle helps to reduce bulk at the center of your project, which can be particularly beneficial for items like amigurumi or other small, detailed pieces. By starting with a tightly controlled loop, you can minimize the amount of excess yarn and fabric at the center, resulting in a cleaner and more streamlined appearance.
Finally, the magic circle provides improved control and shaping of your crocheted pieces. By adjusting the size of the loop as you work, you can fine-tune the shape and dimensions of your project, ensuring a more precise and tailored outcome. This level of control is invaluable for creating intricate and complex designs, as well as for achieving a perfect fit for items like hats, mittens, and other wearables.
Preparing Your Materials
Before you embark on your crochet journey using the magic circle, it’s important to ensure that you have the right materials and tools at hand. The first step is to select the appropriate yarn and hook size for your project. Consider the weight and fiber content of the yarn, as well as the desired gauge and tension you aim to achieve. Choosing the correct hook size will help you maintain consistent stitches and tension throughout your work.
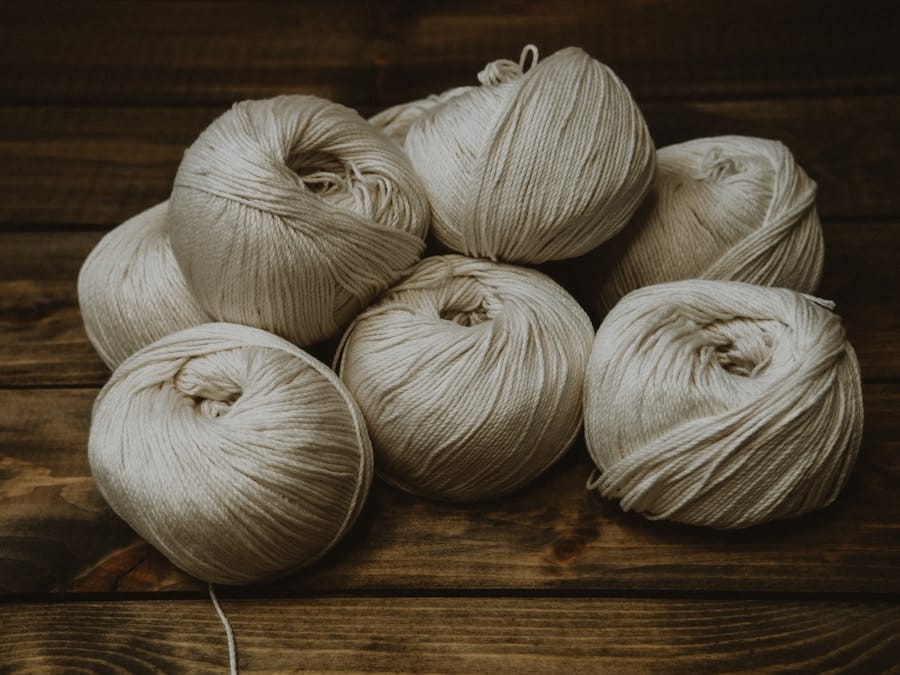
Proper yarn preparation is also crucial for a successful magic circle experience. Make sure your yarn is properly wound and ready to use, with minimal tangles or knots. This will allow the yarn to flow smoothly through your fingers as you work, facilitating a seamless and efficient crocheting process.
In addition to the yarn and hook, it’s important to familiarize yourself with the necessary crochet stitches and techniques required for the magic circle. Depending on your project, you may need to know how to work single crochet, double crochet, or other stitch patterns. Take the time to practice these stitches and techniques before attempting the magic circle, as a solid foundation in the basics will make the transition to this more advanced technique much smoother.
Finally, gather any additional tools or accessories that may be helpful for your magic circle projects. This could include stitch markers, tapestry needles, or other specialized tools that can assist you in maintaining the circular shape and consistent tension as your work progresses. By having all the necessary materials and tools at the ready, you’ll be well-prepared to dive into the world of the magic circle and unlock its full potential.
Step-by-Step Guide to Creating the Magic Circle
| Chapter | Pages | Techniques |
|---|---|---|
| 1 | 10 | Basic stitches |
| 2 | 15 | Increasing and decreasing |
| 3 | 12 | Color changing |
| 4 | 18 | Working in the round |
Mastering the magic circle technique is a straightforward process that, with a bit of practice, can become second nature. Let’s dive into the step-by-step guide to creating the perfect magic circle.
The first step is to form the initial loop. Start by holding the yarn with your non-dominant hand, leaving a 6-inch tail. With your dominant hand, wrap the yarn around your fingers to create a loop. Ensure that the tail is positioned on the underside of the loop, as this will help secure the circle later on.
Next, secure the loop with the first stitch. Insert your crochet hook into the center of the loop, yarn over, and pull a loop through. This first stitch will help stabilize the circle and prevent it from unraveling as you continue to work.
Now, it’s time to complete the first round within the circle. Depending on your project, you’ll need to work a specific number of stitches into the center of the loop. This could be 6 single crochet stitches, 4 double crochet stitches, or any other stitch pattern that your pattern calls for. As you work these stitches, be mindful of maintaining even tension and keeping the circle tidy.
Once you’ve completed the first round, it’s time to tighten the circle to the desired size. Gently pull on the tail of the yarn, which will cause the loop to close and the stitches to come together. Adjust the size of the circle as needed, ensuring that it’s not too tight or too loose.
To solidify your understanding of the magic circle, it’s essential to practice this technique with various stitch patterns and project types. Try creating simple circles, amigurumi pieces, or the beginnings of hats and bags. The more you work with the magic circle, the more comfortable and confident you’ll become in its execution.
Remember, the magic circle is a versatile technique that can be adapted to suit your specific crochet needs. With patience and persistence, you’ll soon master the art of creating seamless and tidy starting points for all your crocheted projects.
Increasing Stitches within the Magic Circle

One of the key advantages of the magic circle is its ability to facilitate the increase of stitches within the circle, allowing you to shape and expand your crochet projects with ease. Understanding the concept of increasing stitches is crucial for mastering this technique.
The basic principle of increasing stitches within the magic circle is to add additional stitches to the existing round, gradually expanding the size of the circle. This can be achieved by working multiple stitches into a single stitch or by adding new stitches between existing ones. The specific method of increasing will depend on the pattern or design you’re working on, but the underlying goal is to create a smooth and controlled expansion of the circle.
When increasing stitches within the magic circle, it’s important to maintain the circular shape and ensure that the increases are evenly distributed. This can be accomplished by carefully planning the placement of the increases and adjusting the number of stitches as needed. For example, you might work two stitches into every third stitch, or you might add an additional stitch between every two existing stitches.
As your project grows, you’ll need to continue incorporating increases to maintain the desired shape and size. This may involve adjusting the number of increases or the placement of the increases based on the specific requirements of your pattern. By mastering the art of increasing within the magic circle, you’ll be able to create a wide range of crocheted pieces, from simple circles to intricate geometric designs.
It’s worth noting that the magic circle is particularly well-suited for projects that require a seamless and continuous increase, such as amigurumi, hats, and other circular or spherical shapes. By working directly into the center of the loop, you can gradually expand the piece without the need for visible seams or joins.
With practice and experimentation, you’ll develop a keen eye for the appropriate number of increases and the best placement to achieve your desired outcome. By combining the magic circle technique with the skill of increasing stitches, you’ll unlock a world of creative possibilities in your crochet journey.
Maintaining Tension and Consistency
Consistent tension is a crucial element in crochet, and this principle holds true when working with the magic circle. Maintaining even tension throughout your work is essential for achieving a polished and professional-looking result.
The importance of consistent tension in crochet cannot be overstated. Uneven tension can lead to distorted stitches, uneven edges, and an overall lack of cohesion in your project. This is particularly true when working with the magic circle, as the adjustable nature of the loop requires careful attention to tension management.
When working with the magic circle, there are several strategies you can employ to maintain even tension. One key technique is to pay close attention to the way you hold and tension the yarn as you work. Experiment with different hand positions and yarn-holding methods to find the approach that works best for you and helps you maintain a consistent tension.
Additionally, it’s important to be mindful of the tension within the magic circle itself. As you work and increase stitches, the size of the circle will gradually expand. Ensure that you’re adjusting the tension of the yarn accordingly, tightening or loosening the circle as needed to maintain an even and consistent tension throughout your project.
Another important consideration is the management of yarn tension during the increasing process. As you add more stitches to the circle, the tension can become uneven, leading to distorted or uneven stitches. To combat this, try to maintain a consistent tension when working the increases, ensuring that each new stitch is added with the same level of tension as the previous ones.
If you encounter any tension-related issues, such as gaps, puckering, or uneven stitches, don’t hesitate to troubleshoot and find solutions. This may involve adjusting your grip, experimenting with different yarn-holding techniques, or even reworking a section of your project to regain control over the tension.
By mastering the art of maintaining consistent tension when working with the magic circle, you’ll be able to create crocheted pieces with a professional and polished appearance. This attention to detail will not only enhance the overall quality of your work but also boost your confidence as a crocheter.
Common Challenges and Troubleshooting
As with any crochet technique, working with the magic circle can present its fair share of challenges. However, with a little troubleshooting and problem-solving, you can overcome these obstacles and continue to refine your skills.
One common issue that can arise when using the magic circle is the appearance of gaps or holes within the circle. This can happen if the initial loop is not secured tightly enough or if the tension is not maintained consistently as you work. To address this, pay close attention to the tension of the first few stitches and ensure that the loop is closed securely before continuing.
Another potential challenge is the circle becoming too tight or too loose. If the circle is too tight, it can result in a distorted or puckered appearance, while a too-loose circle can lead to uneven stitches and a lack of structure. Experiment with adjusting the size of the initial loop and the tension of the yarn as you work to find the sweet spot that works best for your project.
Uneven or distorted stitches within the magic circle can also be a common issue. This can be caused by inconsistent tension, improper placement of increases, or even a miscounted number of stitches. If you notice any irregularities in your stitches, take a step back and carefully examine your work. Identify the source of the problem, whether it’s a tension issue or a counting error, and make the necessary adjustments to get your stitches back on track.
When faced with these challenges, it’s important to have a toolbox of troubleshooting strategies at your disposal. Don’t be afraid to rework a section of your project or even start over if necessary. Carefully examine your work, identify the root cause of the problem, and experiment with different techniques or adjustments until you find a solution that works.
Remember, the magic circle is a skill that takes time and practice to master. Embrace the learning process, be patient with yourself, and don’t hesitate to seek out resources or guidance from experienced crocheters. With persistence and a willingness to problem-solve, you’ll soon be creating seamless and beautiful crocheted pieces using the magic circle technique.
Transitioning from the Magic Circle to Continuous Rounds
As you become more proficient in the magic circle technique, you may find yourself ready to explore the next step: transitioning from the magic circle to continuous rounds. This transition can be a natural progression in your crochet journey, allowing you to create even more seamless and structured projects.
The concept of continuous rounds in crochet is closely related to the magic circle. Instead of working in a spiral, with the beginning and end of each round visible, continuous rounds create a truly seamless and uninterrupted flow. This technique is particularly useful for projects that require a cylindrical or spherical shape, such as hats, bags, and amigurumi.
To seamlessly transition from the magic circle to continuous rounds, you’ll need to apply the skills you’ve developed in working with the adjustable loop. The key is to maintain the circular shape and consistent tension as you move from the initial magic circle to the continuous rounds.
One effective technique is to work the first few rounds within the magic circle, then gradually transition to working in continuous rounds without a visible seam. This can be achieved by carefully planning the placement of your increases and ensuring that the stitches flow smoothly from one round to the next.
As you navigate this transition, it’s important to consider the specific requirements of your project. Factors such as the stitch pattern, the desired shaping, and the overall design will all play a role in how you approach the transition from the magic circle to continuous rounds.
By mastering the magic circle and then applying those skills to continuous rounds, you’ll unlock a new level of versatility and control in your crochet projects. This expanded skillset will allow you to create even more intricate and professional-looking pieces, from delicate amigurumi to structured and seamless accessories.
Remember, the journey of transitioning from the magic circle to continuous rounds is a gradual process. Be patient with yourself, experiment with different techniques, and don’t hesitate to seek out resources or guidance from experienced crocheters. With time and practice, you’ll develop the confidence and expertise to seamlessly incorporate this advanced technique into your crochet repertoire.
Incorporating the Magic Circle into Your Crochet Projects
Now that you’ve mastered the magic circle technique, it’s time to explore the myriad of ways you can incorporate it into your crochet projects. The versatility of the magic circle makes it a valuable tool for a wide range of crocheted pieces, from the whimsical to the practical.
One of the most common applications of the magic circle is in the creation of amigurumi, the delightful world of crocheted stuffed animals and figures. The magic circle’s ability to facilitate a seamless and tidy starting point is essential for achieving the clean and polished look that characterizes amigurumi. By working directly into the center of the loop, you can create the compact and structured foundation needed for these intricate projects.
Beyond amigurumi, the magic circle can also be a game-changer when it comes to crocheting hats, bags, and other circular or spherical items. The technique’s versatility in allowing for increases and shaping makes it an invaluable tool for creating well-fitting and structurally sound pieces. Whether you’re crafting a cozy beanie, a stylish tote, or a decorative bowl, the magic circle can be seamlessly incorporated into your design.
But the magic circle’s applications don’t stop there. This technique can also be adapted to a variety of other crochet projects, such as flower motifs, coasters, and even the beginnings of larger blankets or afghans. By understanding how to work the magic circle and incorporate it into different stitch patterns and designs, you’ll unlock a world of creative possibilities.
As you continue to hone your crochet skills, don’t be afraid to experiment with the magic circle and explore its potential. Combine it with your favorite stitch patterns, play with color and texture, and let your creativity shine through. Share your mastery of the magic circle with the crochet community, inspiring others and showcasing the beautiful and innovative projects you’ve created.
Remember, the magic circle is not just a technical skill – it’s a tool that can help you elevate your crochet work and bring your artistic vision to life. Embrace the magic, and let it guide you on your crochet journey. By mastering the magic circle technique, you can create seamless and professional-looking projects that will impress others and boost your confidence as a crocheter. So, don’t be afraid to practice and perfect this skill, as it will open up a world of possibilities for your creativity to flourish.
FAQs
What is the magic circle in crochet?
The magic circle, also known as the magic ring or adjustable ring, is a technique used to start crocheting in the round. It allows for a tight and closed center, making it ideal for projects like amigurumi and hats.
Why is mastering the magic circle important in crochet?
Mastering the magic circle is important in crochet because it allows for a seamless and professional-looking start to projects worked in the round. It also provides greater control over the tension and size of the center hole.
What are the steps to create a magic circle in crochet?
To create a magic circle, you typically start by making a loop with the yarn, then working a series of stitches into the loop to form the center of the project. There are various methods and techniques for creating a magic circle, and it’s important to find the one that works best for you.
Are there any tips for beginners to improve their magic circle technique?
For beginners looking to improve their magic circle technique, it’s important to practice the method that feels most comfortable and produces the desired results. Additionally, watching video tutorials and seeking guidance from experienced crocheters can be helpful in mastering the magic circle.
What are some common mistakes to avoid when working with the magic circle?
Common mistakes when working with the magic circle include pulling the center hole too tight, not leaving enough yarn to weave in the end, and not securing the circle properly before starting the first round of stitches. It’s important to pay attention to these details to ensure a successful magic circle.
Related posts:
 Wool vs Acrylic: Unraveling the Differences and Discovering the Best Yarn for Your Project
 The Ultimate Guide to Crochet Hook Materials: Which One is Right for You?
 DIY Crochet Stitch Markers: How to Make Your Own Unique Designs
 The Ultimate Guide to Crochet Blocking Tools: Everything You Need to Know